

How To Add Pictures To Screensaver Windows 10
The Screen saver is however part of Windows xi and 10, and you can easily customize them if you demand it. For example, you lot tin enable or disable the screen saver, change timeout settings, password protect the Screen saver, and then on.
If you want, y'all tin either set a unmarried photograph or multiple photos as a screen saver on Windows 11 or 10. When you prepare numerous photos equally a screen saver, the images will brandish as a slideshow when the screen saver is running on your Windows 11 or ten PC. This is the built-in feature of Windows, which means you don't need to use a tertiary-party tool to ready photo(s) as a screen saver on your motorcar.
This gearupwindows article will guide you on setting Photos as a Screen saver in Windows 11/10.
How to Set up Photos equally a Screensaver in Windows 11?
To set Photos as a screen saver in Windows 11, do the following:-
Footstep 1. First, press the

Step two. Then, select the
Step 3. Later on that, click on the
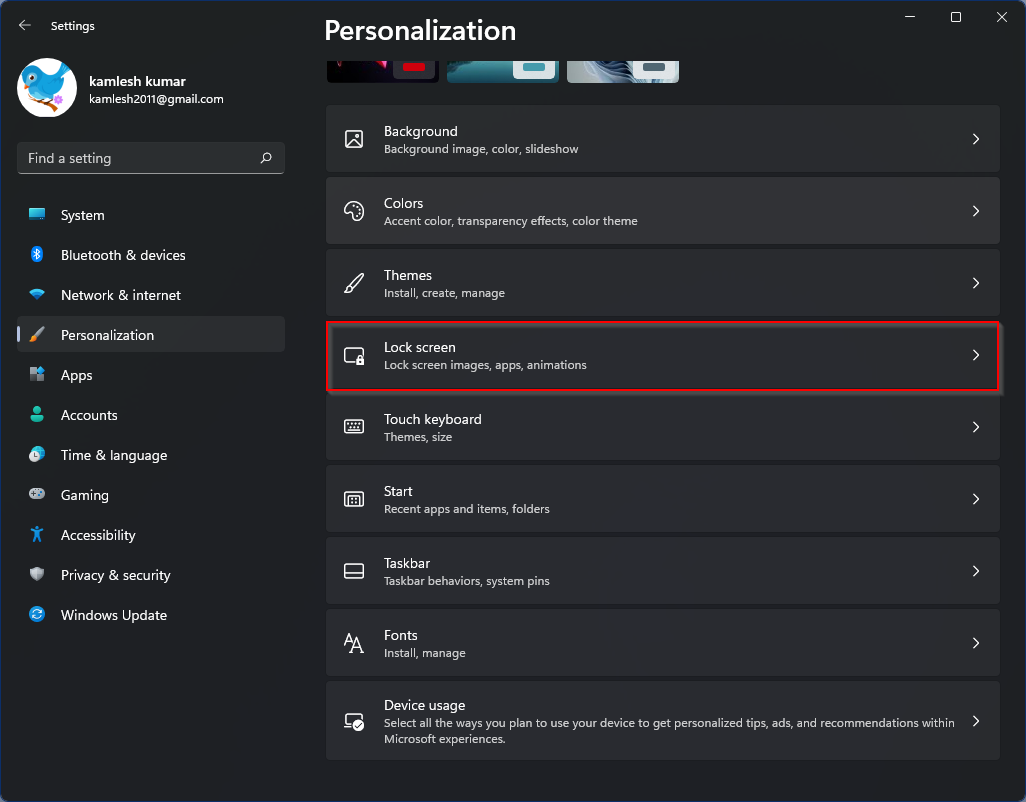
Step 4. Side by side, click the
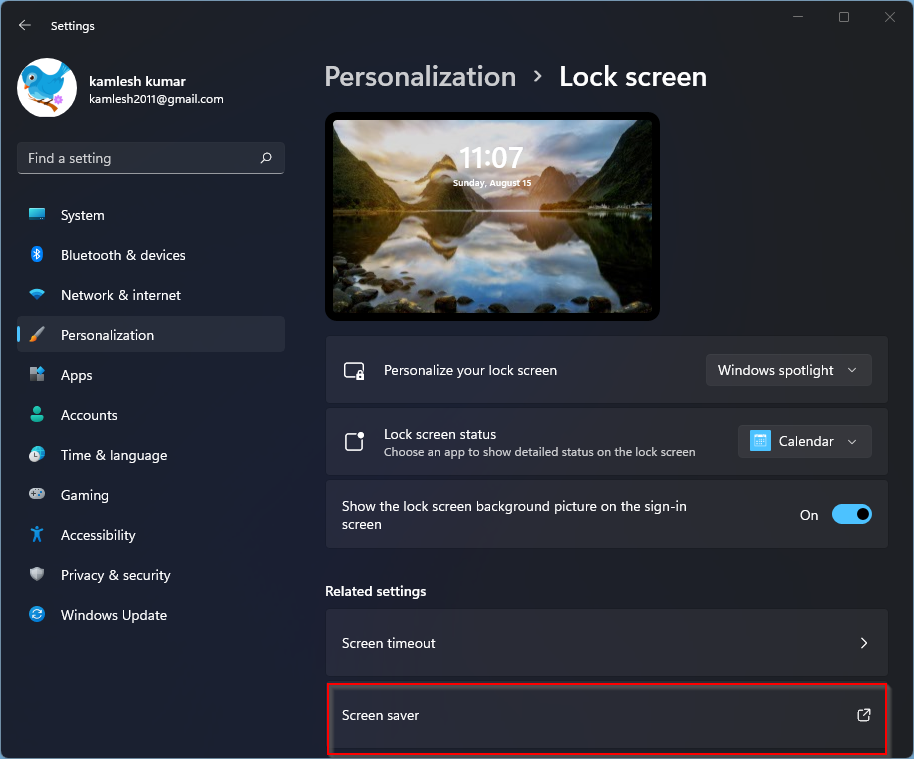
Pace 5. In the Screen Saver Settings window, select

Note: By default, Windows xi uses photos saved in the Pictures folder in Windows Library for the screen saver. To use the images from the other folder, keep reading the mail.
Step 6. Click the

Step 7. Then, click the

Pace 8. Next, select a binder containing images yous want to apply equally a screen saver and click the

Step ix. Now, if you want, yous tin modify the Slide bear witness speed and enable the Shuffle pictures option. When you're done, click the

Step 10. On the "Screen Saver Settings" window, click the
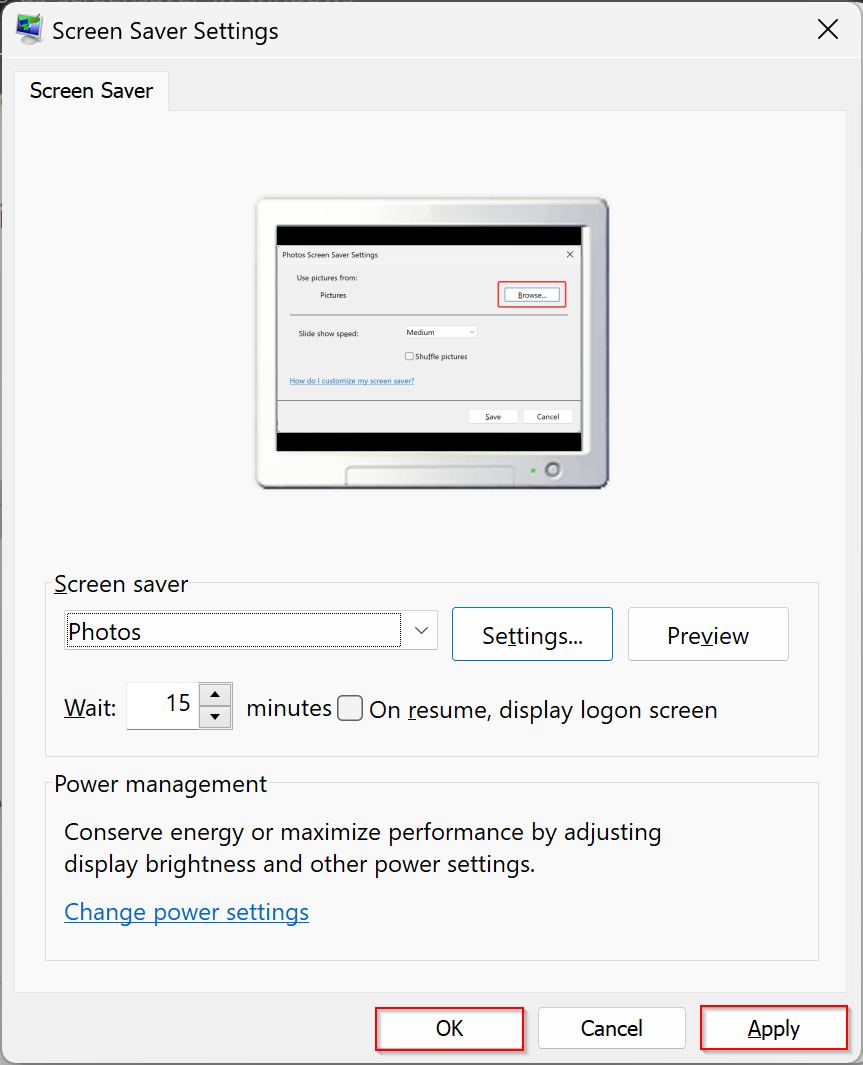
Step 11. Finally, click the
Note: If there are subfolders nether the selected folder, photos in sub-folders will too be used for screen savers past Windows.
How to Set Photos as a Screensaver in Windows ten?
To set photos every bit a screen saver in Windows 10, hither are the steps:-
Step one. At first, right-click on the empty expanse on the desktop and select the

Stride two. The above option volition take y'all to the Personalization section under the Settings app.
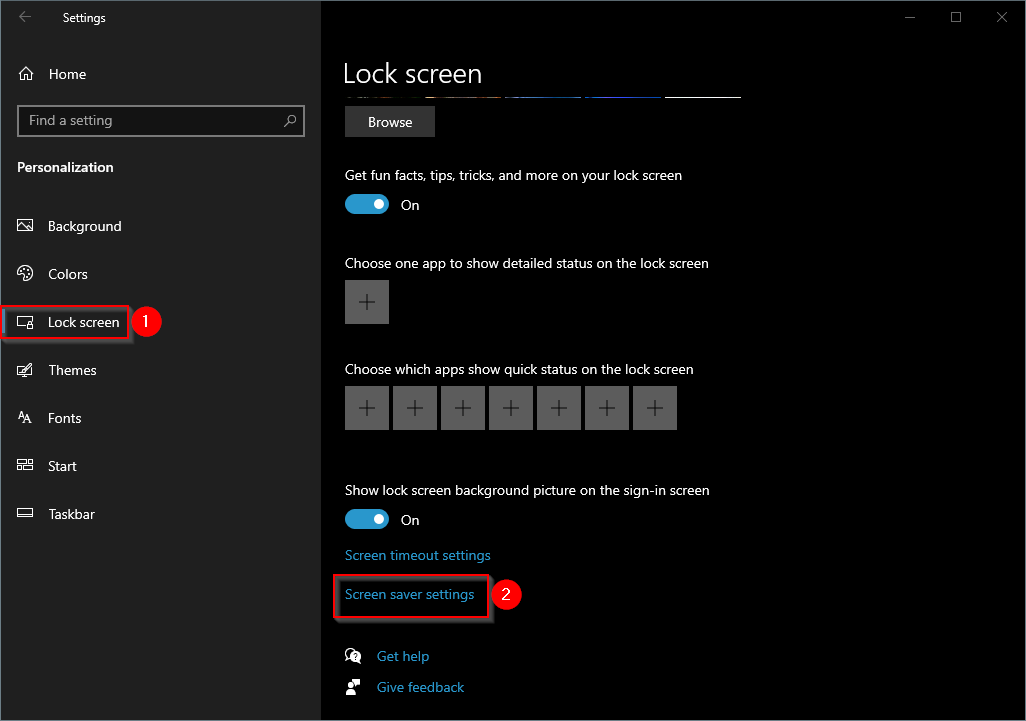
Pace 3. On the left side of Settings, select the
Step 4. When you're washed, the Screen Saver Settings dialog volition open on your computer. Select the
Step v. Now, you will run into similar options every bit you have seen in the higher up Windows xi steps. In the Screen Saver Settings window, select
Note: By default, Windows 10 uses photos saved in the Pictures binder in Windows Library for the screen saver. To use the images from the other binder, continue reading the postal service.
Step vi. Click the
Step vii. Then, click the
Stride 8. Next, select a binder containing images you want to use as a screen saver and click the
Footstep nine. Now, if you want, you tin change the Slide show speed and enable the Shuffle pictures choice. When yous're washed, click the
Pace 10. On the "Screen Saver Settings" window, click the
Step 11. Finally, click the
That's it.
Source: https://gearupwindows.com/how-to-set-photos-as-a-screensaver-in-windows-11-or-10/
Posted by: dahlstromwhalke38.blogspot.com
0 Response to "How To Add Pictures To Screensaver Windows 10"
Post a Comment